Featured Slider

Showing posts with label DIY. Show all posts

DIY : Something Up On My Door

DIY Door Hanger Instead of A Wreath

I have this one habit, that could be perceived as being creepy - that is peeking at the houses while I am out and about - be it a car ride or neighborhood walk or even a TV show - if there is a house I am sure to give it a good look. When I first came to US, one of the first things that I started noticing - besides clean roads and lush lawns was the wreaths hanging on houses - on most of them anyway. That is one thing you wouldn't see much in India - you dont hang stuff on doors there other than may be nameplates. But I loved the tradition nonetheless.

A door hanger was the first thing I thought of, made, hung up - in this new house. I know that be it design or decor or organizing - door hanger isn't really the first thing you need. One doesn't really need it either. But for me, somehow it was important to have something up on my door. A feeling that without it, it isn't home yet. Freak! I may be!


I had base wreath and many wreath making supplies in my DIY stash. But for reasons unknown I didn't make one in advance. I wanted one that is close to nature and I love the look of magnolia leaves or olive leaves on the doors - Like this one above. But they were way out of budget and I needed one quickly. That is when I spotted this basket on clearance from Home Goods. I just got it home without any clear direction.

DIY Door Hanger Instead of A Wreath

It is funny that making a wreath was one thing that forced me to unpack my decor/craft stash faster than expected. A thorough search brought out these faux yellow leaf stems, a bird and some dried flowers that were part of potpourri. The glue gun and the wreath hanger were the only other things I needed to make something unique for our door.

Door Hanger Instead of A Wreath

DIY Door Hanger Instead of A Wreath

Only thing I did was to tuck the yellow stems tightly inside the basket and glue on the faux flowers and bird in place. Boom - you have your one of a kind door hanger. It could easily be wall decor - so it is safe to say that they might find a new place inside the home when season calls for.

Here is a visual of our door from farther -


DIY Door Hanger Instead of A Wreath


So that is how this pretty ended up on my door. What do you have one your door? Do you make DIY or buy them? Spill all about your door secrets here, I love to hear them.

Cheers,
Anima


DIY : A CHARMING WALL ART

yarn wall art diy with wood dowels and gold hoops


Do you know my most favorite craft material is yarn - for many reasons.For one, they are available in a zillion colors - enough to satisfy my color crazy soul. Then the texture they bring - soft and rich at the same time, especially with the variety of yarns out there - incredible. Then again, they are simple to handle ( some of the type of yarns don't come cheap - but yet) easy to manipulate, there is room for errors - I can think of more reasons for why I love yarn if I really set out to find.

Today I am sharing this charming , simple and sweet wall art over at Home Made By Carmona, Do check it out and let me know what you think. Direct Link is here.


DIY : A BOHO CHIC WOOD VASE

Honestly speaking I am not in any need of a new vase. But then you take a casual stroll around your favorite craft store and you spot a raw wood vase in a classic shape. Would you be able to resist? Especially when it costs on $6 and you have 50% off coupon some where in your wallet? Neither could I. So I got the vase ( Insert a smiley here, would you please?)

But this DIY is much more interesting than my shopping story. When you read the rest of this post and find out what I did with my plain jane wood vase,- it would blow your mind with its simplicity. Really - Nothing more simple than this one.

DIY Boho chic wood vase with easy instructions

These days I am trying to keep my decor and accessories to a minimum.A lot of it has to do with my new found tidying obsession . When you keep quantity of things to a minimum, what can add interest is the patterns and geometry on the surfaces. That is what I aimed for anyway. So I chose a design that has beautiful pattern on it.

DIY Boho chic wood vase with easy instructions


The first thing that came up to my mind when I started imagining the ways to get creative with it was the jewelry holder project Jen recently did on I heart Organizing. The marbled gift wrap has stayed in my mind ever since. But it was from Minted but I could not justify the dollars. So I got on my ideas wagon and a rummage through my washi tape collection solved my problem. Doesn't this traditional pattern bring you this perfect boho chic vibe?

So here is the How to of my boho chic wood vase.

DIY Boho chic wood vase with easy instructions

What You Need

A plain vase in interesting shape
Washi Tape of your choice
Scissors


Step 1: (Insert a smile here, please) . Measure and apply the washi tape and cut at edges. To ensure a smoother coverage, try to overlap the tape over the edges to the adjacent side. If your tape has a recurring design as in mine - you have to take extra care to get the continuity of the pattern.

Step 2: Continue until you cover the entire vase.

DIY Boho chic wood vase with easy instructions

Tip : Mine is a wooden vase - for fresh flowers you will have to use a small glass tube to fill with water.

DIY Boho chic wood vase with easy instructions

Do you love these simple decorating projects ? What crafts are you guys whipping out these days?
Share your ideas and comments below.

Easiest way to re-purpose your shoe boxes

Last week I told you I was inspired by the book Life Changing Magic of Tidying up. I meant it. There are a number of ideas that are worth pursuing in the book even if it isn't completely for you. Here is an idea I tried out.

Re-Purpose your shoe boxes into pretty storage

Covering up boxes and fabric is not new to blog world by any means. Blog land has shown us that we can cover boxes with anything from fabric to vinyl to leather to gift wrap. But who takes the trouble unless it is for giving gifts or for valentines day celebration at school?

One idea suggested by Marie Kondo regarding storage solutions is that to have minimum of them. Instead of buying more and more baskets and bins and boxes to store things, re-purpose the random boxes which would end up in trash otherwise. That is where these shoe boxes come in to picture. Have you noticed that they are of moderate size, sturdy and well built and 99 % of times same size. That kind of uniformity is what I love most about them.

But to use them as such isn't really pretty idea - now is it? I wanted to make them look alike, presentable and yet durable. That is when I thought of contact paper. The glossy sealed surface make it durable , and used on a day to day basis.

What you need 

Shoe boxes, any sturdy boxes
Self adhesive paper - Mine is from here
Sissors

There are a ton of tutorials that explain how to do them. But here is the way I found most comfortable.


Easiest way to cover boxes with paper or fabric

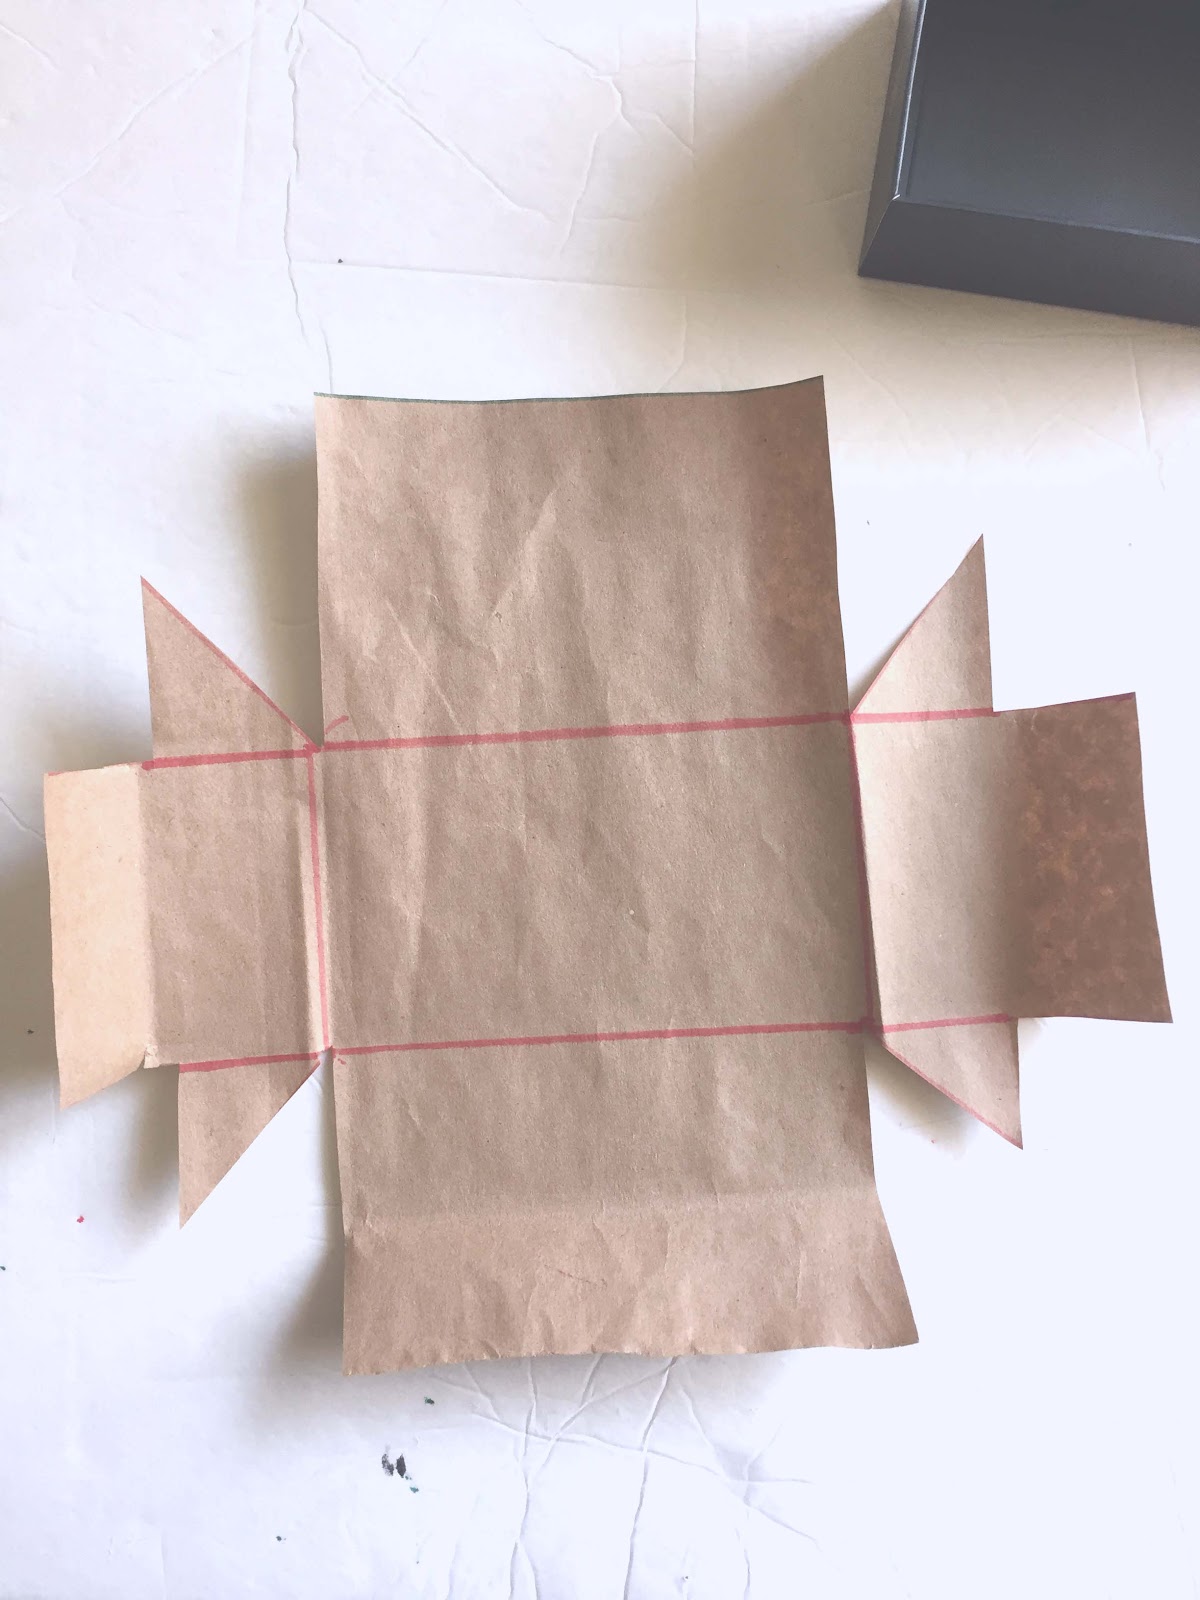
Step 1 : I have used a brown paper and a box lid to show the process. First step is to cut down the paper/fabric. Easiest way to asses the size needed is to lay the box on the sheet of paper, measure the height of the box and mark and cut the double of the height over all sides.

Step 2 : Now lay the box in the middle and draw lines as in the first picture. I have missed out the horizontal lines - my bad - this is why you should think multiple times before photographing.  Anyways, please do this.

Step 3 : Do you see on the vertical lines I have marked a dot in the midway and darkened the lines till that point? that is exactly the height of the box. You will realize why if you look at the next picture in the collage.

Step 4 : Once you finish drawing it is time to cut along the lines. Once done, the paper should look like how it is in the below picture.


Step 5 : Now it is time to fold over like I have shown in the collage. If you are using contact paper, it will have adhesive backing. But if you are using a regular paper or fabric use glue or tape as you see fit. I suggest spray adhesive which makes the finish cleaner and durable.

Additional  Tip : This same technique works with box of any shape. First measure the height of the box and keep the paper size double the height for all sides. Cut angular way for every alternating side. That way you will get every other sie to overlap covering the whole box.

That's it - your box is ready for the show.

Re-Purpose your shoe boxes into pretty storage


This is a fun activity for a weekend or during a craft time with kids. It is great to have pretty storage on display at the fraction high end cost?

Hope you enjoyed and will try it.  If you find easier methods to cover - new tutorials - do share - I am on the look out for easier and easier solutions.

Would like to know must must have storage solutions fit for a frugal, minimal and tidy home? Do check back on friday and you will have the list with sources.

See you.


Around Here Lately

I know I have been absent from here. A lot - Life happened in between and kept me away from here - not an acceptable excuse - but honestly true - Lots of things happened, are happening around me that are extremely successful in keeping me away form my happy place - yet I check here everyday - wondering if at all there is a new comment - But anyways, that is about that.

Between - I re-designed the blog. Did you notice? Isn't it cleaner and much more legible now?

I don't really have a new DIY post here, but I do have one over at Home Made By Carmona - How I made these adorable photo shelves - Do check out the post here.

DIY Photo Shelves with Michaels wood cubes.


Easter is around the corner - Spring break is almost over. The other day Ursula @Home Made By Carmona tagged me to share our tablescape for Easter - and this is what I came up with. Do you follow me on Instagram? We do have a lot of fun there.

A very simple easter table

And that reminds me of our plans this year and beautiful memories we made last year - do you remember ? If not check these posts and the read about the How-To of these projects here.

DIY Rainbow Easter eggs

We also dyed our eggs for the first time - the natural way - read all about it here.

Dye eggs naturally this Easter

What are your plans for Easter? You guys done with spring break yet? And please do come back on Monday to read about my journey with de-cluttering and things I learned from the famous Kon Marie method.
Wish all my readers a very happy Easter. May god bless you.

See you fresh on Monday. Stay happy and healthy.


Create Your Own Unique Centerpiece

Unique Wood Candle Centerpiece

Unique Wood Candle Centerpiece

Did you happen to read my last post on how I wrapped my tea light candles with Washi tape and called it hep and classic? If not do check it out here. Anyways I didn't stop there with them . I had been thinking about making a centerpiece for the dining table that isn't visually heavy or cluttering for a while - the gold candles gave me the prefect idea to come up with something simple yet unique.


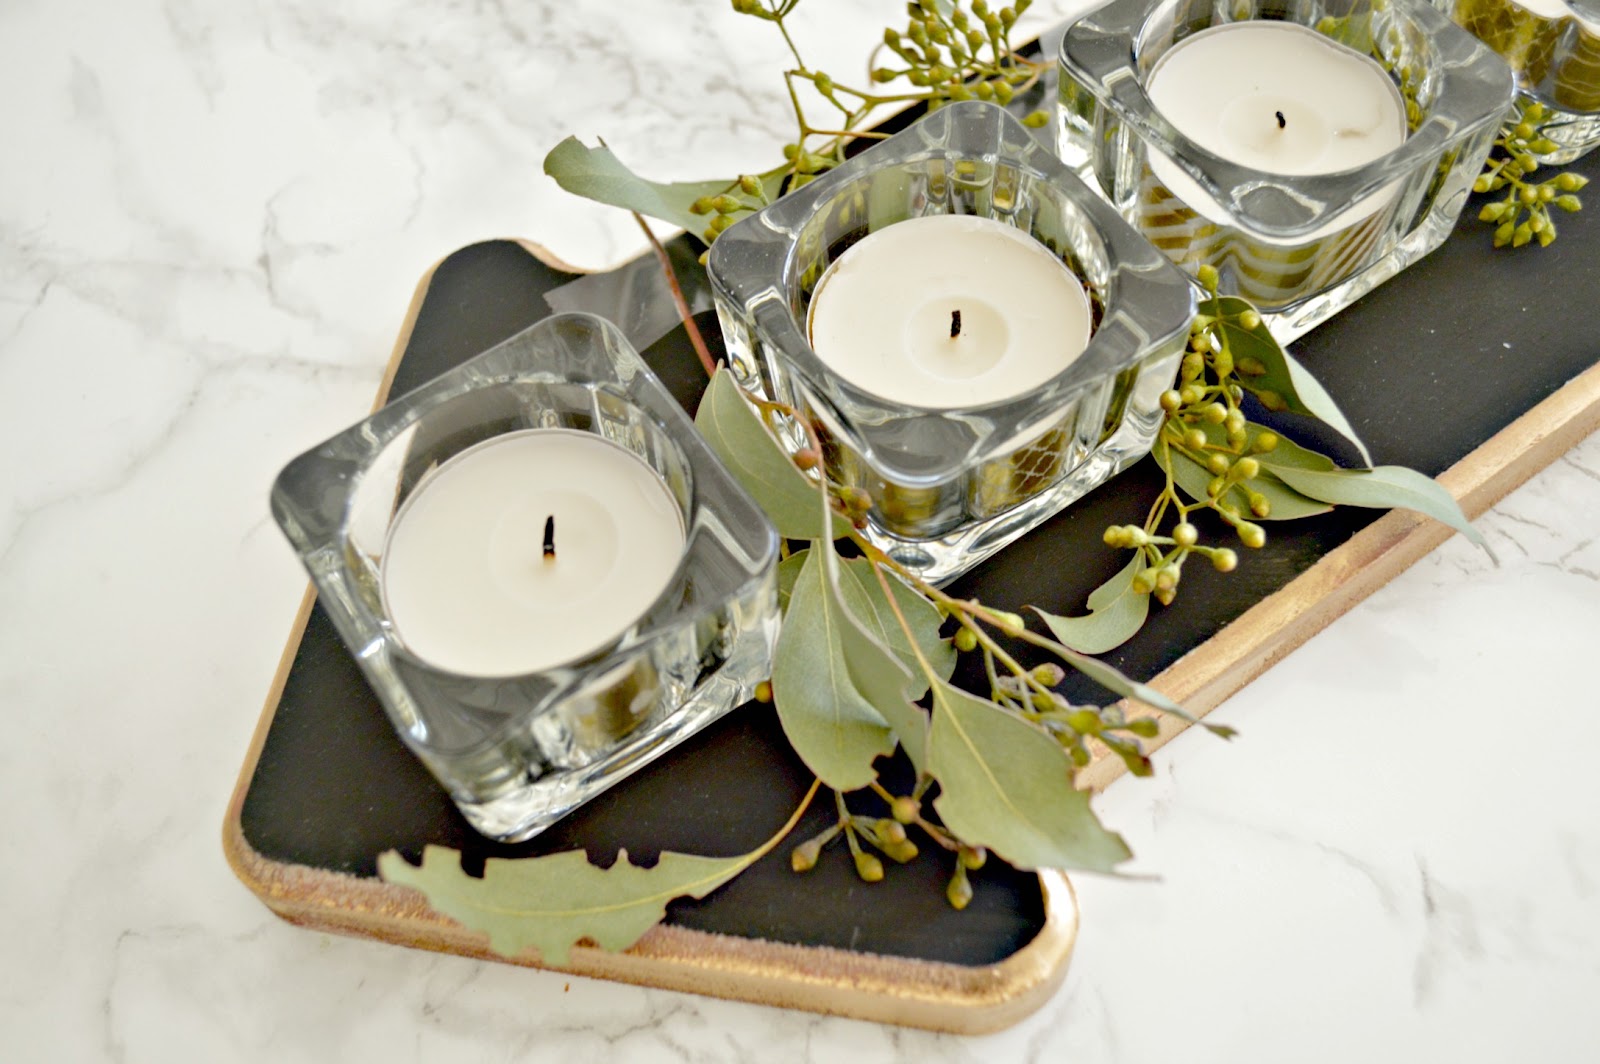
I found this piece of scrap wood in the shape of an arrow at #Michales ( well no surprise there - I find almost everything from there) and decided to make use of it for my centerpiece.  All I had to do was to paint it black with edges gold ( I would have left it wood or even stained it but spilled some paint over - so had to paint to cover up) .

Unique Wood Candle Centerpiece

Next all I did was to stick a few plain candle holders with E6000 glue on the wood piece and add some left over eucalyptus stems for decoration. Of course the tea lights inside them are my washi covered candle sweet hearts.


Unique Wood Candle Centerpiece

Isn't it unique but simple?  What I love most is the custom holder doesn't involve neither power tools nor a lot of effort. All done well under 30 minutes. A 30 minutes well spent right!

I don't know about you - but I have a small dining table and when I have guests - I have to move my centerpiece away always to make room for plates and bowls - But this one is thin enough and so out of the way that I hope not to have to do that again. And even if I have to I find consolation in that it isn't heavy at all :-) Do you do centerpieces and decorate the dining table? Do you have to move it away like me too?

Do you like what you see? If yes,  Please subscribe (on the side bar, it is free) and get regular updates or follow us on FACEBOOK or PINTEREST

Happy New Year & A Candle DIY

Gold Washi Tape Candle DIY

Happy Happy New Year Friends !!

Hope all of you are off to a great start this time. Do you make new year resolutions? I am a person who usually makes one or two every year only to forget a month or even a few days later. But this time - I am serious. So serious that I am daring to jot it down and share with you. Bold right! Necessary too. 

I have three resolutions rather goals for this year. At the outset they seem fairly easy - but that is when you actually know what to do to reach those goals. I am starting only with a certain clarity which I need to refine and turn in to actionable objectives. So what are they?
  • Be mindful and Simplify
  • Read/Re-Read classic books - by myself and with Akshara
  • Spend more time with the Blog ( Plan the posts ahead/improve photography)
As I said they seem fairly easy when you just read it or hear it. But I have to figure out how -to reach them on the go.

If you are following me on Instagram, you already know that we are off to a great start with with reading , reading Little Princess By, Frances Burnett with Akshara. We are enjoying the curious Sara's adventures and quirky thoughts to the fullest. 

Now regarding the first goal, being mindful and simplifying - I have to work much harder for this. I have picked up a real gem to help me start off. I am not really that person to pick up books to help me organize and do household chores. Until now I thought we all know how to do it - kind of like inherited the knowledge somehow - until I came across Marie Kondo's  Life Changing Magic Of Tidying Up. I picked it from library for sheer curiosity to find out what the buzz about this book really is - but after reading through say ten pages, I knew I have to have it. The book, the ideas and the concepts resonates with you and your thoughts completely and I am sure any homemaker would feel the very same way. More on that later.

Gold Washi Tape Candle DIY


I do have a very mindful DIY today to share with you, that resonates with the goals for the year - that is simple and mindful and adds to those moments when you take time for what matters. 


Supplies

Teal Light Candles
Washi Tape
Scissors

Gold Washi Tape Candle DIY

Gold Washi Tape Candle DIY

It is a simple process - the idea is to cover the regular plane Jane tealight candles with pretty tape and you are done and ready for next dinner party or a beautiful yet very regular supper with family.

Gold Washi Tape Candle DIY

Gold Washi Tape Candle DIY

You can also place them in a regular candle holder for added safety.

Gold Washi Tape Candle DIY

Simple job with least amount of effort but adds a ton of charm to your evenings, right! Let simple be new pretty! So have you started working on your resolutions? what are your goals this brand new year? Share with this community, let us have some fun.

Do you like what you see? If yes,  Please subscribe (on the side bar, it is free) and get regular updates or follow us on FACEBOOK or PINTEREST


Wrapping Up


We are at the fag end of a very eventful year. It has been a good year for this small blogging adventure too. It has been a little more than an year I have been blogging (If you would kindly forget and forgive me for those 5 odd months I went AWOL) But anyways, I learned so much, came across wonderful opportunities and am sure beautiful things are yet to happen, including a surprise early next year - Thank you all - all those who read me, leave comments above all encourage me to move forward.


Before I wrap up - here is a little wrapping inspiration for you all. I have used most generic wrapping paper and twine here, but I did spruce up with clay gift tags.

I have used the regular Air Dry Clay - which I rolled out and cut out in the shape ( in my case a tree) and painted it - then decorated with things I already had in hand. I believe any generic wrapping paper can be notched up with a thoughtful handmade tag - and these are proof.


Materials

Air dry Clay
Knife
Mod Podge
Glitter Dust
Confetti
Colored Fennel Seeds

Take a handful of clay and using a roller pin roll it out to medium thin sheet. I used a tree template cut out on card board as stencil and cut out the shape from sheet with a knife. Do not forget to make a small hole on the top to tie up.

How- To


It takes a day for air dry clay to dry (polymer clay could be baked and ready in half an hour. Once dry you can paint it and decorate. I used mod podge to glue my decor stuff on to the tag. They stay as long as you handle gently.


Now wrap your gifts and tie up using twine how ever you want.

So that is a wrap from This Design Journal for now. See you all after the holidays. Wish you all a merry Xmas and happy happy Holidays.


Personalized Polka Dot Ornaments


What is happier than making your own ornamnets and watching them thinking of the moments you made them? I say gifting your creations to dear friends and share those moments with them. That is what I did with this set of ornaments - Made them, decorated them and even personalized them with their initials. Happy right!

Decofoil Personalized Polka Dot Ornament


I wanted a classy look because this particular friend loves things classic - be it a story, be it accessories - so I went for white and gold and red. But other than the color choices ( for which I though long and hard) everything else about this DIY is simple and is done under an hour.


Supplies

Ceramic Ornaments
The zot transfer dots
Gold foil Paper
E6000 Glue
Foil Transfer Letters (Michaels )

It all started with the white ceramic ornaments I spotted at Michaels. I had the Gold Foil transfer sheets. I knew the combination would be classic. Besides I haven't known a girl who didn't love polka dots yet -  What was tricky in my plan? Finding a way to make perfect dots. I tried with hole punches and sticking them to the ornament - but that was messy and fussy and glue all over. I searched for an alternative - that was also the time I came across Therm O Web products ( remember the posts here and here) and I found the Zots adhesive Dots perfect for my project. I ordered them through Amazon though ( free shipping is hard to pass up!).


Once you have the adhesive dots - it is fairly simple. You have to ensure you don't touch the dots with your hands - instead use the ornament itself to adhere it directly. Once you have the dots on the ornaments - cut down small strips of the foil sheets and press it on the glue dot, metallic side up.


I used the same technique with the transfer letters - Only i had to use E6000 glue to stick it to the ornament. Simple and easy diy project for a quiet afternoon - right!


Decofoil Personalized Polka Dot Ornament

Have you finalized your gift giving plans for the year? do you think DIY ornaments make a cool gift for a dear one?

DIY : Glitter Dipped Snowflake Ornaments

DIY Snow Flake Glitter Ornament

Christmas trees are definitely festive and fun. I agree completely. But you have to also agree with me that they don't come cheap. You get a real tree or fake it does drain your wallet. Do you know what drains your wallet more? The decorations and ornaments. They are a dollar or two a piece - but think how quickly they add up!


What drains me more is the fact that kids demand different things every year - putting up the very same set every year is not something they are not crazy about. I do have a set of special ornaments that I repeat everyyears - but then, they are special because they were made by us or gifted.

Now since I have been doing it for past three years, I know better and do better. I make them at home as much as possible. They are not super fancy or take up a ton of time and effort. On the other hand I am going for simple - that I can customize a different way come next year. So here I am sharing some of my favorite ones over the next few days. They are super simple and you can easily replicate or even take it to much fancier level.

First up is glittered snow flake ornaments.

Materials

Snowflake Gift Tags ( you can even cut out papers)
Acrylic Paint
Mod Podge
Glitter Dust

DIY Snow Flake Glitter Ornament

To start off I painted them white, since I have a white and gold theme going on. Once the paint is dry, which takes about 10 minutes - tape off some part of the snow flake and apply a thin layer of mod podge. Generously spread a layer of glitter dust and let it sit for a few minutes.

DIY Snow Flake Glitter Ornament

DIY Snow Flake Glitter Ornament

 Shake off the excess dust and let dry for thirty minutes. Apply another thin layer of mod podge to seal off the glitter. and you are good to go.

DIY Snow Flake Glitter Ornament


Simple right! I bought 2 bags of the tags from target for a dollar each, I had rest of the supply in hand. that means 12 glittery home made ornaments for 2 dollars - I am not counting the precious time I spend with my daughter to make those here.


Hope that was easy peasy to inspire you to splatter some glitter dust fun around. Do let me know.